
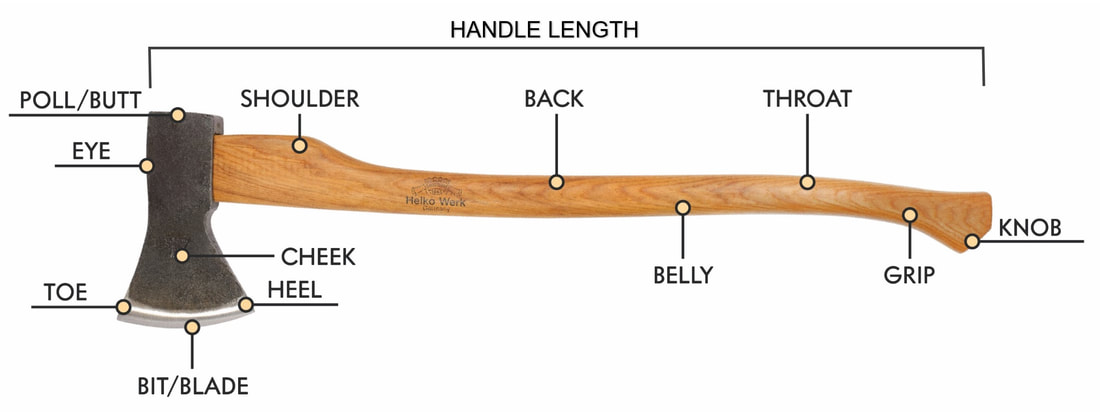
AXE MAINTENANCE AND SAFETY
|
The Edge
Become familiar with proper sharpening techniques. Keep the edge sharp while maintaining the original bevel. Use a flat file and sharpening stone to sharpen your edge. Grinders or sanders can be used with extreme caution, as overheating can alter the steel temper. Our Dual-Sided Axe File has a double-cut pattern for rapid material removal when reprofiling, or for removing dings and nicks from the edge. The single-cut teeth are for finer touch ups, finishing, and deburring. Our dual-grit Axe Sharpening Stone features a coarse side of 120 grit to restore dull edges, and a fine side of 320 grit for finer sharpening. This combination can bring a dull blade to a razor edge. |
|
The Handle
Common causes for broken handles, aside from blatant misuse, are hard overstrikes, lateral (side to side) twisting when lodged in wood, and drying out. When neglected, a handle is more likely to dry out, become brittle, and crack. Proper care will significantly prolong the handle’s life. Maintain and protect your axe handle with boiled linseed oil. It is recommended, even with a new axe, to apply multiple coats of boiled linseed oil to heavily saturate your handle. For a proper finish, this should be done in stages over a couple weeks, allowing each coat several days to fully dry. Doing this will help to ensure the handle stays healthy, flexible, and retains a proper moisture level. This will form a strong protective finish that will endure years of service. Use 150 grit sandpaper to smooth out chips and restore a damaged finish, as necessary, while re-oiling afterwards. Keep the eye saturated with linseed oil to prevent the wood from drying out and shrinking, which can cause a head to loosen. |

|
|
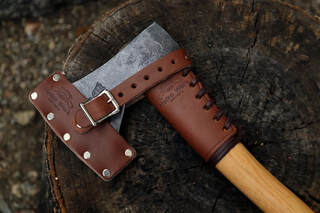
Sheath
Always use a sheath to protect the axe blade. This will not only help protect against injury to the user, but also from accidental damage to the blade’s edge. Leather oils or conditioners should be used on occasion to maintain and reinvigorate the leather of your sheath. Neglected leather, over time, will begin to harden, crack, or fall apart. |
|
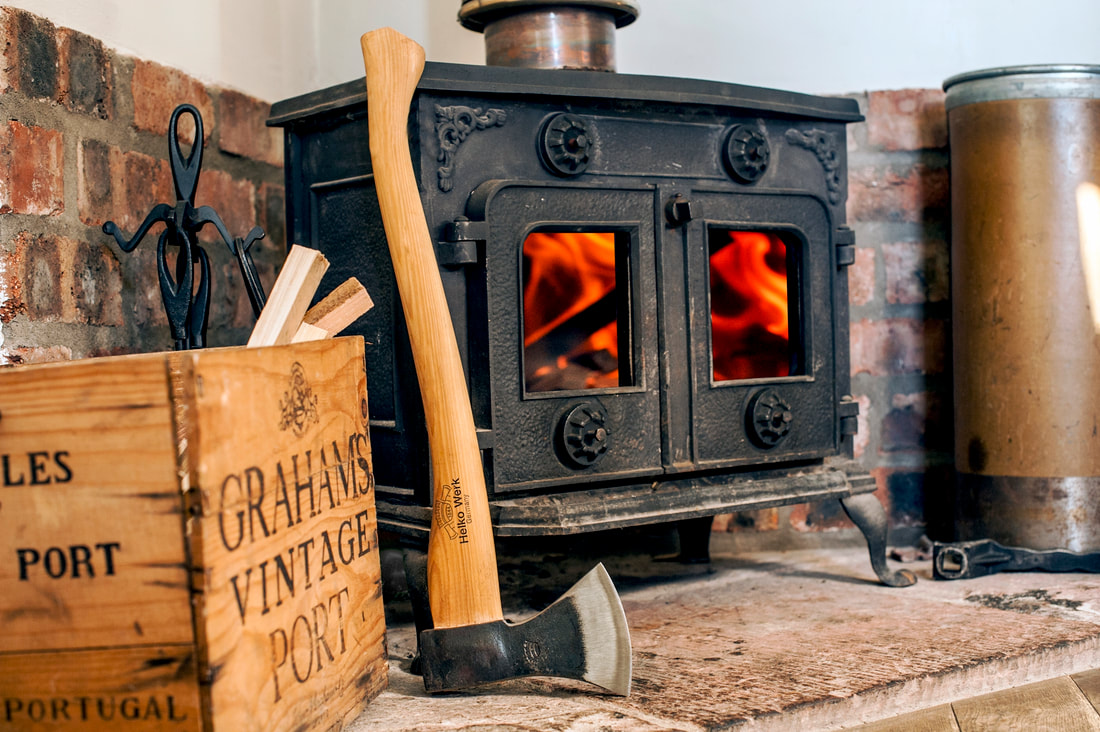
Storage
Store your axe in a cool, dry place. Excessive exposure to moisture and the elements may cause damage over time. Do not store in direct sunlight, or near a stove, fireplace, or other heat source. This can cause significant damage to handles by lowering humidity levels in the wood. After using your axe, always clean and oil the head. |
|
|
Rust Protection
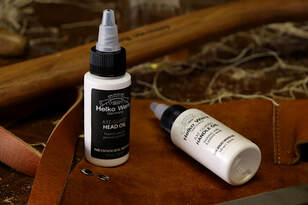
High grade carbon steel is susceptible to rusting over time. Rust can be prevented by keeping the axe head well oiled. If rusting does occur, use steel wool or an abrasive to remove the rust, and then wipe down with Axe-Guard™ Head Oil. Axe-Guard is a metal protecting and rust preventative oil, and the residue is safe for contact on leather or wood. |
|
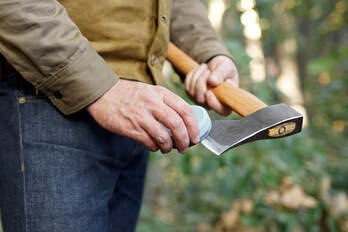
Proper Technique & Safety
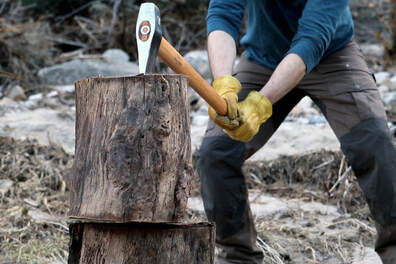
When splitting, use a firm and stable chopping surface to reduce the risk of injury or damage to your tool. Never split wood against the ground. Take care to avoid striking the handle against logs or other objects, which can happen in the event of a miss swing, and is the leading cause of damaged handles. If your axe blade becomes stuck in a log, rock it back and forth in line with the blade. Never twist side to side, as this may break your handle. Use additional caution when splitting frozen or knotty wood, as it can be very hard and may damage the tool or cause the blade to bounce off. Use common sense when splitting wood - not all wood can be split with an axe. Wood must be selected, seasoned, and ready to split in order for the tool to function as intended. Relying on brute strength and simply striking as hard as possible, as opposed to using proper technique combined with the right wood, may lead to early handle breaks. Accidental miss swings and flying debris can cause serious injury to the eyes, feet, and body. Eye protection, steel-toed boots, and proper clothing and protective gear should always be worn. Spectators should maintain a safe viewing distance. The back side of axes and hatchets (referred to as the "poll" or "butt") should not be used as a striking surface. Only sledgehammers should be used to pound in steel wedges. Never use an axe, maul, or hatchet if you are tired, on medication, or intoxicated. |
|
The Vario Axe System - Proper Use and Care
|
Our Vario axes are exceptional tools, but they must be cared for properly. It is important to take the time and ensure the bolts are always tight and snug before each use or splitting session. If the bolts begin to loosen over time, and the axe is still used, the forces and pressures from swinging is diverted and concentrated onto the bolts themselves, rather than be evenly distributed throughout all parts as designed. These axes will outperform conventional axes, but they do require the additional time and attention to ensure the bolts are snug and tight before using.
Remember to tighten your bolts, keep the axe dry and indoors when not in use, and keep the head and parts lightly oiled during storage. Do not over tighten the bolts. Tightening snug and firm by hand is ideal. Do not use heavy duty torque wrenches, as you risk over tightening, which could risk cracking the wood in your handle. Do not use loctite on the bolts. Wooden handles do expand and shrink overtime. Using loctite prevents the bolts from adjusting to this shrinkage, and could lead the bolts to be over tightened or too loose. Do not strike the Retainer Cap, which is the rear/back blade along the poll. This axe is not designed to be used as a maul, and should never be used to strike other objects with the poll side. |
|
Sharpening & Sharpening Tools
If properly cared for, a Helko Werk axe will last a lifetime. When it comes time to resharpen the blade, always use quality sharpening implements as they are the surest and most effective means of achieving a perfect edge. Sharpening frequency will depend on how often you use your axe, what type of wood you are chopping, weather conditions during use, and any maintenance routines you regularly employ. Eventually, the blade edge will need to be filed in order to correct the blade shape, remove any nicks or dings that have formed on the edge, and reestablish the bevel face. This is commonly performed with an axe file, and will result in a blade that is functional for chopping, but a file alone cannot produce a fine razor edge. For a fine edge, a sharpening stone must be used to further refine and grind the blade to a higher level of sharpness. Afterwards, if desired, a final session of stropping with leather and compound will further hone the edge and remove any remaining edge burr, resulting in a razor edge that you could shave with.
Repairs
Loose Axe Head
Always ensure that the head is firmly attached to the handle. If your axe head becomes loose and begins to wiggle on the handle, do not be alarmed. In most cases this is a simple and easy fix. It can be caused by a wide variety of reasons, while the most common being weather acclimation or wood shrinkage. If, for instance, your axe is transported from a wet or humid climate to a dry climate for extended periods of time, the wood may begin to dry out. As wood dries, it will shrink slightly. If your axe is not maintained over time with a handle conditioner, such as boiled linseed oil, it will begin to dry out and shrink. Follow these steps to repair a loose or wiggling head.
1) Hold the axe upside down freely in the air with one hand on the grip. The head should be pointed towards the ground, but not touching. With your other hand, take a hammer (preferably a wooden mallet, so as not to crack the handle) and pound down on the bottom of the flat end of the grip. Pound several times with firm yet controlled hits. This action will force the head to slide down the handle. Continue hitting until the head stops moving. Generally, you can expect to see a few millimeters of movement, and perhaps even up to a centimeter. This may only require a handful of hammer hits. If hammering the handle has caused the wood wedge in the eye to raise up beyond the top of the handle and head, you should tap this back down with a wooden mallet until flush with the eye and handle.
2) Take a new steel ring wedge and hammer it into the eye of the axe head, just like a nail into wood. The ideal position is centered in the eye, in front of or behind the existing steel ring wedge, where you have available space for it to fit. You will need to use a steel hammer to pound down your ring wedge until it is flush with the top of the handle. Pounding in wedges may require many repeated strikes from a hammer.
3) The third step is not required, but strongly recommended. Take some boiled linseed oil and with a rag wipe down the entire axe handle, including the eye. Let the axe sit for 15 minutes or so, and then wipe off the excess oil completely with a clean rag. Then, let the axe sit and fully dry for a couple days for the best result.
Steps one and two should take a couple minutes. Step three is extremely helpful, and should only take a few moments of actual work.
Step 1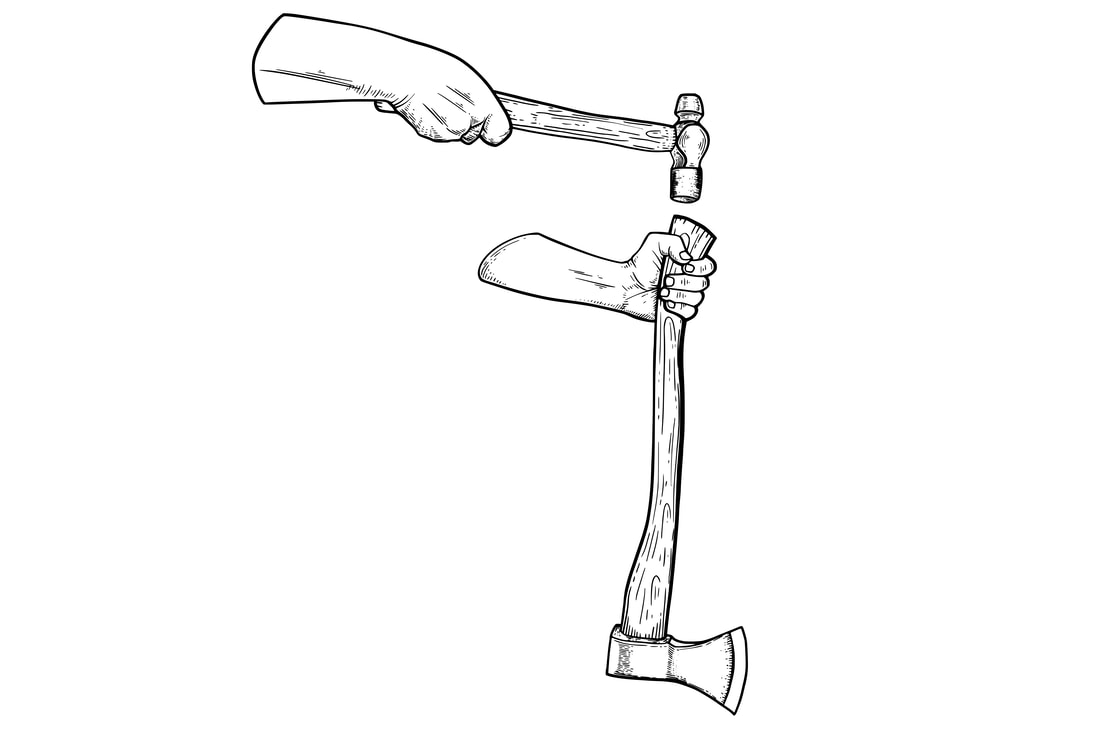
|
Step 2
|
Step 2 (Completed)
|
Removing an Axe Head From a Handle
To remove the current axe handle, you will need to remove the wedges first, before the head can slide off of the handle.
1) Saw off the existing handle at the neck, directly below the bottom of the head.
2) Drill holes in front of, behind, and around the existing ring wedge in the eye. Also drill a hole directly through the center of the ring wedge. Avoid drill bit contact with the steel of the axe head.
3) Use a heavy duty flat head screwdriver to pry out the steel ring wedge. Once the steel wedge is removed, you can begin to pry or pull out the remaining pieces of the wooden wedge.
4) Use a steel punch to tap down the remaining handle through the eye opening, pushing it out through the axe housing.
Once finished and the eye is clear and clean, the axe head is now ready for a new handle to be inserted from the bottom.
Step 1
|
Step 2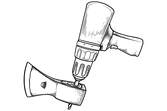
|
Step 3
|
Step 4
|
Step 5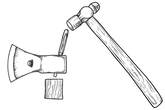
|
How to re-handle your axe
1) Fit your new handle into the head through the bottom of the head's eye. Press the head down onto the handle as far as it will comfortably go. Then you can use a mallet, preferably wood, to help tap the head down completely. Step 1 may require shaping and sanding the handle for a perfect fit. Take your time, and work carefully and cautiously.
2) Once the handle reaches beyond the top of the head, and the fit is secure, use a saw to cut away the excess handle protruding from the top of the head, if necessary.
3) Apply some wood glue to your wooden wedge for a secure fit, and use a wooden mallet to firmly tap the wooden wedge down flush with the handle.
4) Place your steel ring wedge in the center of the eye, and use a steel hammer to firmly but carefully tap the wedge down flush to the top of the handle, as you would a nail with a hammer.
5) Apply a boiled linseed oil finish to your handle. The eye also needs a linseed finish. You can soak it in a tray, or wipe heavily with a rag.
Step 1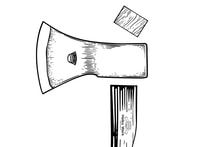
|
Step 2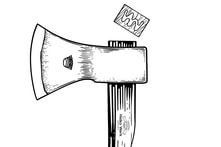
|
Step 3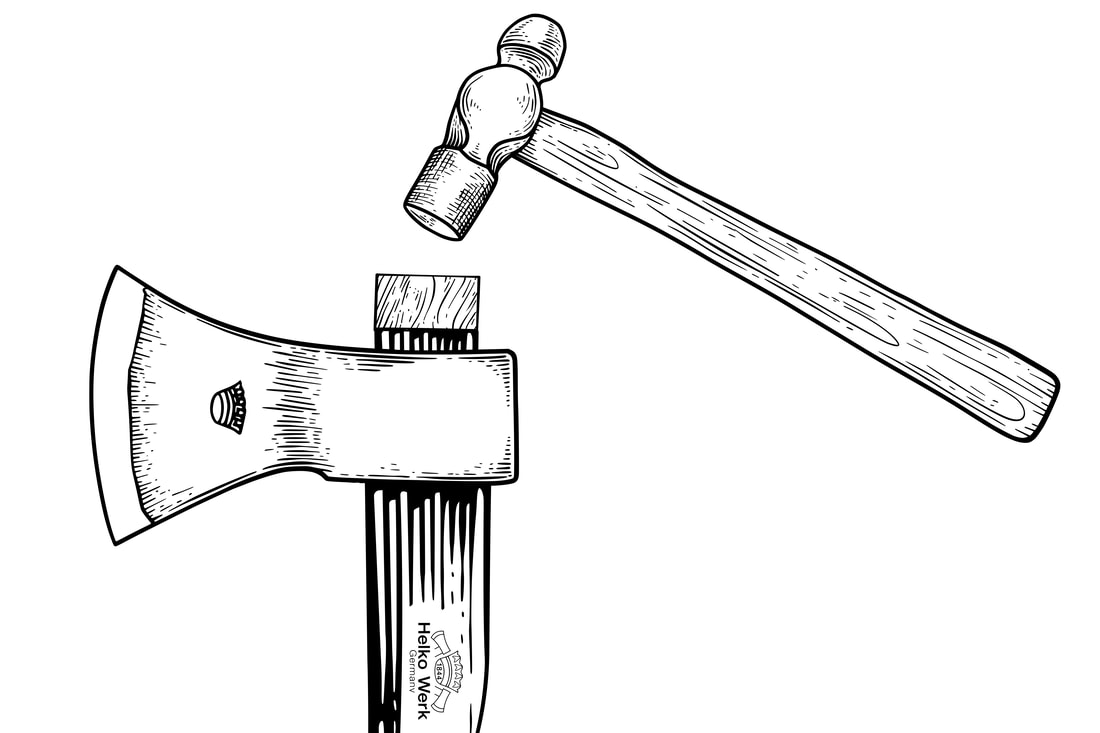
|
Step 4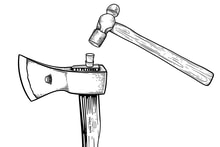
|
TERMINOLOGY
Axe Head
All Helko axes are forged from German C50 High Grade Carbon Steel, with a Rockwell hardness of approximately 53-56HRC.
Axe Handle
There is a small variety of wood suitable for axe handles. Hickory is generally considered the best suited, being hard and dense, but with exceptional flexing strength. Ash is also a common choice, but not as ideal a wood as hickory.
Cutting Axe
An axe with a blade that features a shallow wedge angle, and is designed to be used for cutting, as opposed to splitting.
Dropforging
A process in which a smith controls a drop hammer to shape hot steel, as the hammer falls repeatedly onto the steel.
Felling Axe
Used to chop down trees by cutting across the grain of the wood.
Hatchet
A small, lightweight axe designed to be used with one hand.
Heat Treated
A process that involves heating or chilling the steel, typically to extreme temperatures, to achieve the desired result such as hardening or softening the metal.
Maul
A heavy, long handled sledge hammer with an axe blade on the opposite end of the head. Mauls are commonly used for splitting heavy wood.
Oil Hardened
A process where hot forged steel is quenched in an oil bath to cool and harden the steel. Similar to water-hardening, but less likely to cause small chinks and other minor defects in the metal.
Clear Lacquer Coating
A clear lacquer coating is applied to our axe heads for long term rust protection. As the axe is used, this coating will wear off. Our axes are made from high grade carbon steel, which is susceptible to rusting if not properly cared for. If one prefers to remove the coating, it can easily be done using a solvent, such as lacquer thinner. Lacquer thinner will not damage the metal, but will suck out any protective oils in the steel or wood handles. The head and handle should be oiled after a lacquer removal.
Splitting Wedge
A wedge, typically made from steel or aluminum, which is used to split wood. A sledge hammer is required to drive the wedge into the wood.
Turn-Around Hook
A small hook at the bottom of a maul's blade, which is used to turn over a log.
Water Hardened
A process where hot forged steel is quenched in a water bath to cool and harden the steel.